FortiGate L2TP over IPsec VPN Setup (Complete Configuration Guide)
Description
Learn how to configure FortiGate L2TP over IPsec VPN step by step with GUI & CLI, including user setup, policies, and troubleshooting.
Scope
This guide explains how to configure FortiGate L2TP over IPsec VPN using both GUI and CLI.
It is designed for:
- Beginners who want a simple setup guide
- Network engineers who need full configuration details
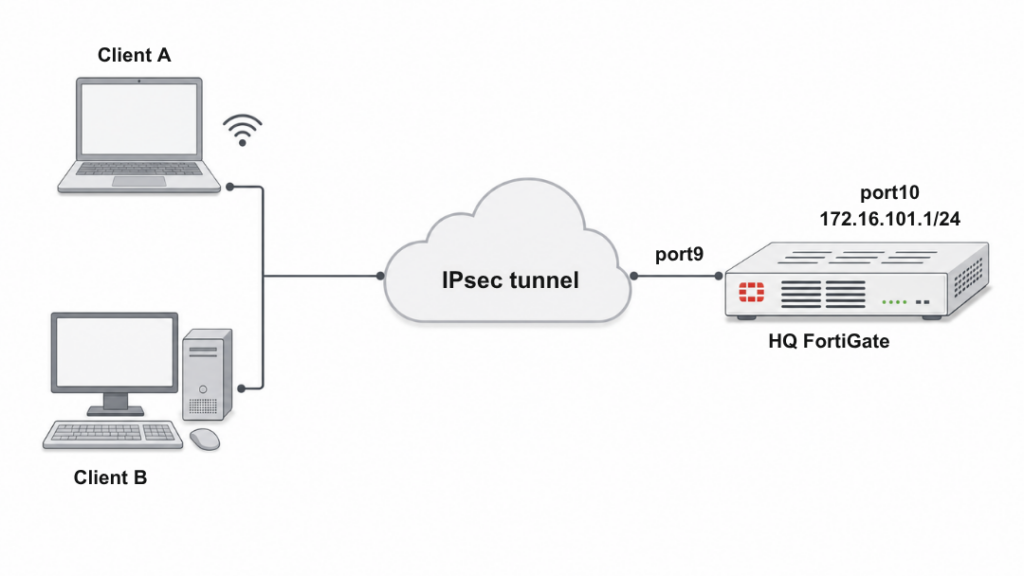
In this setup:
- A FortiGate firewall acts as VPN server
- Clients (Windows / Android) connect using L2TP over IPsec
- Authentication is done using Pre-Shared Key (PSK) + local users
Solution
GUI Configuration (Quick Setup)
Step 1: Create VPN
Go to:
VPN → IPsec Wizard
- VPN Name:
L2tpoIPsec - Template Type: Remote Access
- Remote Device: Native / Windows Native
Step 2: Authentication Settings
- Incoming Interface:
port9 - Authentication Method: Pre-shared Key
- Pre-shared Key:
your-psk - User Group:
L2tpusergroup
Step 3: Network Settings
- Local Interface:
port10 - Local Address:
172.16.101.0 - Client IP Range:
10.10.10.1 – 10.10.10.100
Click Create
CLI Configuration (Full Setup)
1. Configure Interfaces & Route
config system interface
edit "port9"
set alias "WAN"
set ip 22.1.1.1 255.255.255.0
next
edit "port10"
set alias "Internal"
set ip 172.16.101.1 255.255.255.0
next
end

config router static
edit 1
set gateway 22.1.1.2
set device "port9"
next
end
2. Configure IPsec Phase1 & Phase2
config vpn ipsec phase1-interface
edit "L2tpoIPsec"
set type dynamic
set interface "port9"
set peertype any
set proposal aes256-md5 3des-sha1 aes192-sha1
set dpd on-idle
set dhgrp 2
set net-device enable
set psksecret sample
set dpd-retryinterval 60
next
end
config vpn ipsec phase2-interface
edit "L2tpoIPsec"
set phase1name "L2tpoIPsec"
set proposal aes256-md5 3des-sha1 aes192-sha1
set pfs disable
set encapsulation transport-mode
set l2tp enable
next
end
3. Create User & Group
config user local
edit "usera"
set type password
set passwd usera
next
end

config user group
edit "L2tpusergroup"
set member "usera"
next
end
4. Enable L2TP Service
config vpn l2tp
set status enable
set eip 10.10.10.100
set sip 10.10.10.1
set usrgrp "L2tpusergroup"
end
5. Configure IP Pool
config firewall address
edit "L2TPclients"
set type iprange
set start-ip 10.10.10.1
set end-ip 10.10.10.100
next
end
6. Firewall Policies
config firewall policy
edit 1
set name "Bridge_IPsec_port9_for_l2tp negotiation"
set srcintf "L2tpoIPsec"
set dstintf "port9"
set srcaddr "all"
set dstaddr "all"
set action accept
set schedule "always"
set service "L2TP"
next

edit 2
set srcintf "L2tpoIPsec"
set dstintf "port10"
set srcaddr "L2TPclients"
set dstaddr "172.16.101.0"
set action accept
set schedule "always"
set service "ALL"
set nat enable
next
end
Troubleshooting & Verification
Check IPsec Tunnel
diagnose vpn tunnel list
Shows active tunnels, encryption, and traffic stats
Check L2TP Status
diagnose debug enable
diagnose vpn l2tp status
Displays:
- Connected users
- Assigned IP addresses
- Tunnel statistics
Expected Output (Example)
- Tunnel established
- Assigned IP:
10.10.10.x - Traffic flowing (rx/tx packets increasing)
Notes
- Enable net-device → allows multiple users behind NAT
- Ensure PSK matches on client and FortiGate
- Use transport-mode (required for L2TP)
- Always create firewall policies (most common mistake)
- Use strong encryption (avoid weak proposals in production)
FAQ
What is L2TP over IPsec?
It is a VPN method combining IPsec encryption + L2TP tunneling for secure remote access.
Why use L2TP instead of SSL VPN?
L2TP works natively on Windows and Android without extra software.
Why is my VPN not connecting?
Common reasons:
- Wrong PSK
- Firewall policy missing
- Incorrect IP pool
Can multiple users connect at the same time?
- Yes, if net-device is enabled.
What port does L2TP use?
- UDP 500 (IKE)
- UDP 4500 (NAT-T)
- UDP 1701 (L2TP)