FortiGate IPsec VPN: Ultimate Certificate Setup & Fix Guide
Description
Learn how to configure FortiGate IPsec VPN certificates, fix common issues, and improve secure connectivity with this step-by-step guide.
Scope
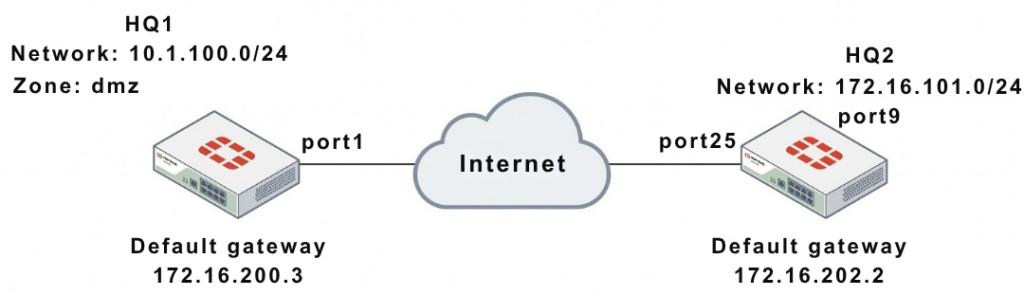
This article covers a complete deployment of FortiGate IPsec VPN using certificate-based IPsec VPN between two FortiGate devices (HQ1 and HQ2).
It includes:
GUI configuration for FortiGate IPsec VPN setup.
- Full CLI setup (HQ1 + HQ2)
- Certificate & CA configuration
Peer authentication in FortiGate IPsec VPN setup.
- Routing & firewall policies
- Real troubleshooting commands and outputs
Solution
1. Network Overview
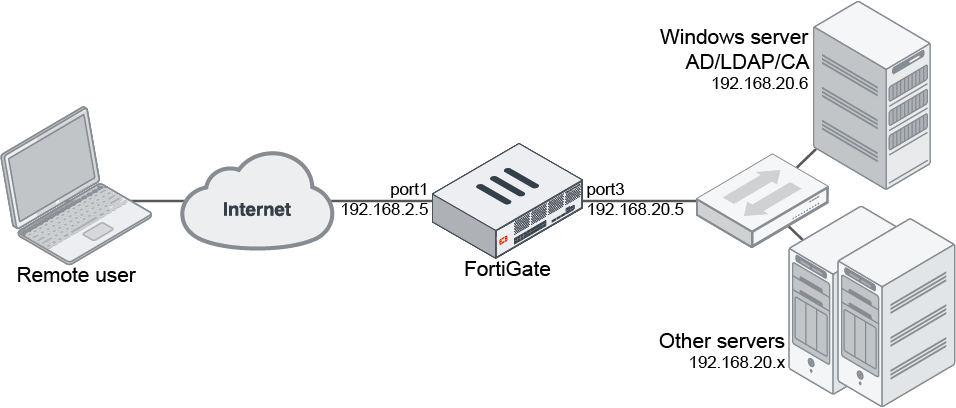
| Device | WAN IP | Internal Network |
|---|---|---|
| HQ1 | 172.16.200.1 | 10.1.100.0/24 |
| HQ2 | 172.16.202.1 | 172.16.101.0/24 |
2. GUI Configuration (Quick Setup)
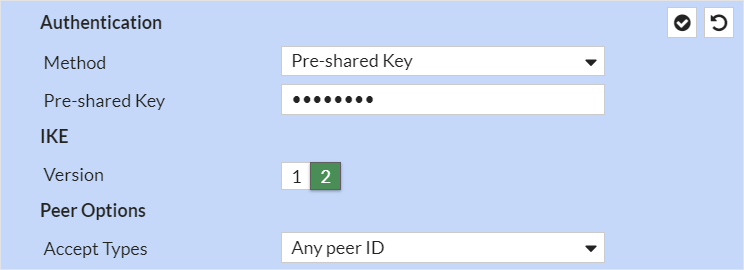
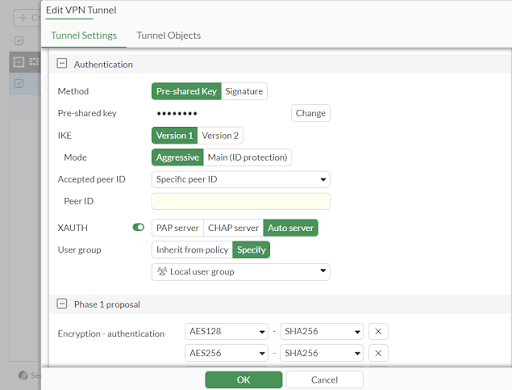
Note:
Change the Authentication Method from Pre-shared Key to Signature to use Certificates.
HQ1 & HQ2 Steps:
- Go to VPN → IPsec Wizard
- Template: Site to Site
- Remote Device: FortiGate
- NAT: No NAT Between Sites
Authentication:
- Method: Signature (Certificate)
- Select:
- Local Certificate
- Peer CA Certificate
Network:
- Configure Local & Remote subnets accordingly
3. CLI Configuration (FULL – HQ1 & HQ2)
WAN Interface & Route
HQ1
					config system interface
edit "port1"
set vdom "root"
set ip 172.16.200.1 255.255.255.0
next
end

config router static
edit 1
set gateway 172.16.200.3
set device "port1"
next
end
HQ2
					config system interface
edit "port25"
set vdom "root"
set ip 172.16.202.1 255.255.255.0
next
end

config router static
edit 1
set gateway 172.16.202.2
set device "port25"
next
end
Internal Interfaces
HQ1
					config system interface
edit "dmz"
set vdom "root"
set ip 10.1.100.1 255.255.255.0
next
end
HQ2
					config system interface
edit "port9"
set vdom "root"
set ip 172.16.101.1 255.255.255.0
next
end
4. Certificate Configuration
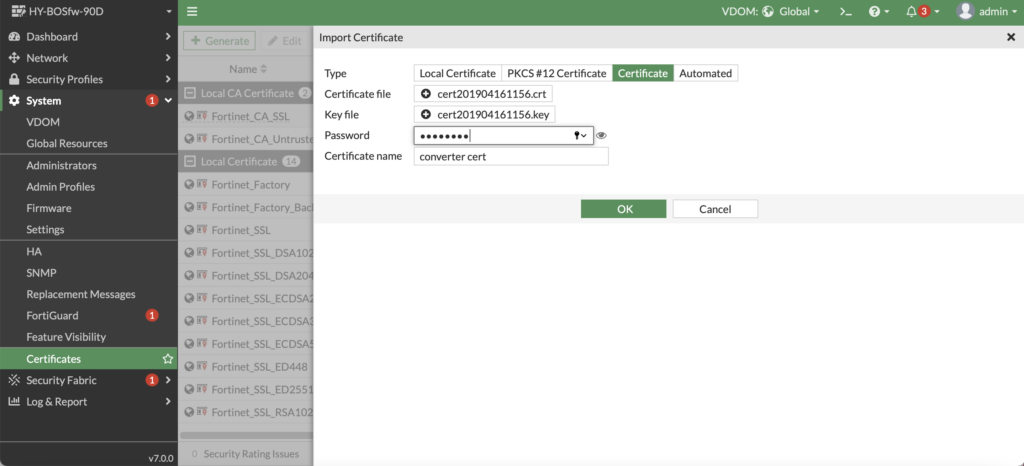
Option 1: Custom CA
					config vpn certificate local
edit "test1"
set range global
next
end

config vpn certificate ca
edit "CA_Cert_1"
set range global
next
end
Option 2: Built-in Certificates
Use:
Fortinet_FactoryFortinet_CA
5. Peer Configuration (BOTH CASES)
Custom CA
					config user peer
edit "peer1"
set ca "CA_Cert_1"
next
end
Built-in CA
					config user peer
edit "peer1"
set ca "Fortinet_CA"
next
end
6. Phase1 Configuration
HQ1
					config vpn ipsec phase1-interface
edit "to_HQ2"
set interface "port1"
set authmethod signature
set net-device enable
set proposal aes128-sha256 aes256-sha256 aes128-sha1 aes256-sha1
set remote-gw 172.16.202.1
set certificate "test1"
set peer "peer1"
next
end
HQ2
					config vpn ipsec phase1-interface
edit "to_HQ1"
set interface "port25"
set authmethod signature
set net-device enable
set proposal aes128-sha256 aes256-sha256 aes128-sha1 aes256-sha1
set remote-gw 172.16.200.1
set certificate "test2"
set peer "peer2"
next
end
7. Phase2 Configuration
HQ1
					config vpn ipsec phase2-interface
edit "to_HQ2"
set phase1name "to_HQ2"
set proposal aes128-sha1 aes256-sha1 aes128-sha256 aes256-sha256 aes128gcm aes256gcm chacha20poly1305
set auto-negotiate enable
next
end
HQ2
					config vpn ipsec phase2-interface
edit "to_HQ2"
set phase1name "to_HQ1"
set proposal aes128-sha1 aes256-sha1 aes128-sha256 aes256-sha256 aes128gcm aes256gcm chacha20poly1305
set auto-negotiate enable
next
end
8. Static Routes (IMPORTANT)
HQ1
					config router static
edit 2
set dst 172.16.101.0 255.255.255.0
set device "to_HQ2"
next
edit 3
set dst 172.16.101.0 255.255.255.0
set blackhole enable
set distance 254
next
end
HQ2
					config router static
edit 2
set dst 10.1.100.0 255.255.255.0
set device "to_HQ1"
next
edit 3
set dst 10.1.100.0 255.255.255.0
set blackhole enable
set distance 254
next
end
9. Firewall Policies (BOTH SIDES)
HQ1
					config firewall policy
edit 1
set name "inbound"
set srcintf "to_HQ2"
set dstintf "dmz"
set srcaddr "172.16.101.0"
set dstaddr "10.1.100.0"
set action accept
set schedule "always"
set service "ALL"
next
edit 2
set name "outbound"
set srcintf "dmz"
set dstintf "to_HQ2"
set srcaddr "10.1.100.0"
set dstaddr "172.16.101.0"
set action accept
set schedule "always"
set service "ALL"
next
end
HQ2
					config firewall policy
edit 1
set name "inbound"
set srcintf "to_HQ1"
set dstintf "port9"
set srcaddr "10.1.100.0"
set dstaddr "172.16.101.0"
set action accept
set schedule "always"
set service "ALL"
next
edit 2
set name "outbound"
set srcintf "port9"
set dstintf "to_HQ1"
set srcaddr "172.16.101.0"
set dstaddr "10.1.100.0"
set action accept
set schedule "always"
set service "ALL"
next
end
10. Troubleshooting (FULL RAW OUTPUT)
Debug Command
diagnose debug application ike -1
Error Example
ike 0: to_HQ2:15314: certificate validation failed
Verify Gateway
diagnose vpn ike gateway list
					vd: root/0
name: to_HQ2
interface: port1
addr: 172.16.200.1:500 -> 172.16.202.1:500
IKE SA: established
IPsec SA: established
Tunnel Status
diagnose vpn tunnel list
					name=to_HQ2
bound_if=port1
stat: rxp=0 txp=0
enc: aes
dec: aes
status: up
Note
- Certificate VPN = more secure than PSK
- Both devices must trust the same CA
- Always configure blackhole route
- Time sync (NTP) is critical
- Fix typo:
172.16.2001 → 172.16.200.1
FAQ
Why use certificate VPN?
More secure and scalable than PSK.
Why tunnel not coming up?
Certificate mismatch or wrong peer config.
What is Phase1 vs Phase2?
Phase1 = tunnel setup
Phase2 = data encryption